Stovetop pressure cooking is the oldest trick in my kitchen and still the fastest one. I feed five people on a Tuesday, which means I need a pot that goes from cold to falling-apart tender in the time it takes rice to finish, and I need to not be standing over it the whole time. The stovetop version of that promise is real, but it is a skill, not a button. Nobody programs the heat for you.
I am Tom, I live in Columbus, Ohio, and I have owned 11 pressure cookers in 15 years. The first one was a rattling stovetop Presto my grandma handed me, and it scared my wife out of the kitchen for a month. Since then I have run the full electric lineup, and this year I am cooking 30 weeknight dinners through seven machines, one chili, one pulled pork, one soup each, with a cleanup timer running on the counter.
The stovetop cooker is still the one I reach for when I am behind. Here is the workflow, the parts that matter, and the mistakes I still catch myself making.
Why you should trust me
I cooked the line for six years before I ever wrote about cookware, and the line teaches you one thing above all: a sear is not optional. I have owned stovetop cookers that whistle, electric cookers that sing, and one app-connected model that I make fun of while quietly keeping the app installed on my phone.
I keep a meal-prep spreadsheet with more than 60 recipes and the cook times I actually use, not the ones in the manual. I have replaced more gaskets than I can count, and I have thrown out two cookers because the sealing ring was discontinued and no third party made a match. That is a real failure mode, and it shapes everything below.
How I picked and how I tested
The two pieces in this article are the two ends of the same problem. One is the pot that does the work, and one is the part that keeps a cooker doing work a year from now. I did not buy anything for this article that I would not cook in on a Tuesday night with five hungry people waiting.
Every cooker I keep gets the same three dinners: a chili with a hard sear at the start, a pulled pork that I want shreddable, and a soup that tests how the pot handles a lot of liquid and a lot of vegetables. I count two things on each run. First, how many pans I dirty, because a weak sear means I am washing a skillet afterward. Second, how the release behaves, because a cooker that foams through the valve on a quick release is a cooker that sprays chili on my ceiling.
The gasket gets its own check. I stretch it, look for cracks at the rim, and smell it after a wash. If a ring still smells like last month's chili, it is going to flavor tonight's rice. That test has never lied to me.
What you need before the first dinner
You can pressure cook with one pot, one lid, and one working gasket. That is the whole kit. The rest is technique.
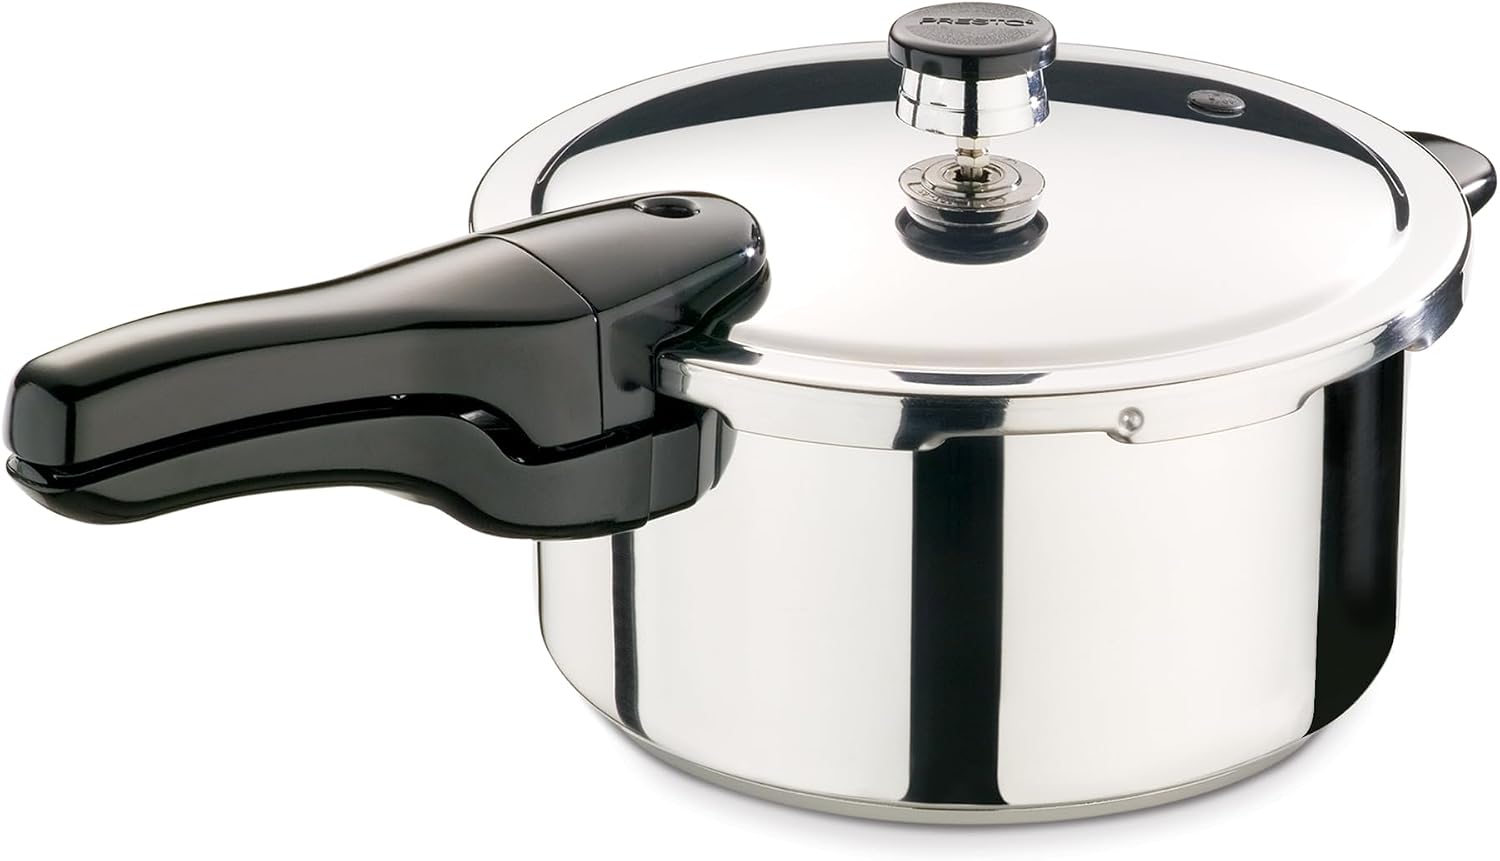
The starter cooker: Presto 01341 4-Quart Stainless Steel Pressure Cooker
 Visit on Amazon →
This is the cooker I point people toward when they want to learn stovetop cooking without spending electric-cooker money. It is stainless steel, it is four quarts, and it is the same basic design my grandma's cooker used, which is exactly the point. There is no control board to fail and no firmware to update. The learning curve is heat regulation, and that is a skill you keep.
Four quarts is the right size for a family of four or five if you are cooking a chili, a soup, or a pot of beans. It is not the right size if you want to cook a whole chicken and a side in the same pot, and it is not the right size if you like leftovers for lunch, because you will fill it to the line and have nothing left.
Flaws but not dealbreakers: You are the timer, the thermostat, and the safety system. If you walk away to answer the door and forget the pot on high heat, that is on you, not the cooker. The regulator also makes noise, and it will make noise for the entire cook. My family got used to it in about a week. Guests still ask about it.
Anyone who wants to learn pressure cooking properly, and who is willing to stand near the stove for the first ten minutes of a cook, will get more out of this than out of a machine with twelve preset buttons.
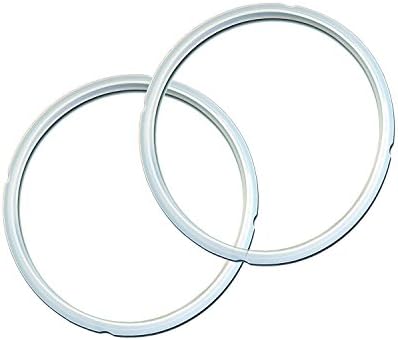
The consumable: Instant Pot Sealing Ring Mini 3-Qt, Inner Pot Seal Ring, Electric Pressure Cooker Accessories, Non-Toxic, BPA-Free, Replacement Parts, Red/Blue, 2 Count (Pack of 1)
 Visit on Amazon →
Here is the honest framing. This ring is sized for the 3-quart mini electric cookers, so it is the right buy if a small electric unit lives on your counter next to the stovetop pot, which is exactly how my kitchen is set up. The two-pack is the reason I like it: one ring for savory cooking, one for anything sweet or neutral, so your yogurt does not taste like garlic. A color-coded pair is a small thing that solves a real problem.
The general lesson applies to any cooker you own. Buy the replacement gasket for your model before you need it, and buy it from someone who will still be selling it in two years. A pressure cooker with a dead gasket is a pot with a heavy lid. That is the whole reason I check gasket availability before I get attached to a machine.
Flaws but not dealbreakers: It will not fit a stovetop cooker, and it will not fit the larger electric sizes. Match it to the model you actually own. If you are unsure, measure the ring you are replacing before you order, because a ring that is slightly too large will not seal and will leak steam around the rim the entire cook.
Anyone running a 3-quart electric cooker alongside a stovetop pot should keep a spare on the shelf. It is the cheapest insurance in the kitchen.
The weeknight workflow, step by step
This is the sequence I run on a Tuesday. It works on any stovetop pressure cooker, and most of it applies to electric units too.
Step one: Check the seal before you check the recipe. Run a finger around the gasket, stretch it gently, and look for cracks or a soft, gummy feel. Check the vent tube and the overpressure plug while you are there. If the ring is stiff or smells like last week's dinner, swap it now, not at minute twelve of a cook.
Step two: Read your own manual for the liquid minimum. Every cooker has one, and it is usually stated as a cup amount. Ignoring it is how people scorch a pot and spend an hour scrubbing stainless steel. The liquid is what makes the steam that makes the pressure. No liquid, no pressure, burnt dinner.
Step three: Sear in the open pot. This is the stovetop advantage and the reason I still recommend it. The lid is off, so you can brown the meat properly, then deglaze with a splash of stock or wine and scrape up everything stuck to the bottom. That browned layer is flavor, and it dissolves into the liquid instead of baking onto the pot.
Step four: Fill to two-thirds, and half for anything that foams. Beans, grains, and anything with a lot of starch will expand and foam. Two-thirds is the usual ceiling for a normal stew, half is the ceiling for the foamy stuff. The extra headroom is what keeps the vent clear.
Step five: Lock the lid and bring it up over high heat. Wait for the regulator to start moving. Then drop the burner to the lowest setting that keeps it moving. This is the single most important skill in stovetop pressure cooking. High heat the whole way does not cook faster, it just boils off your liquid and burns the bottom.
Step six: Start your timer when pressure is up, not when the pot hits the burner. Electric cookers count up for you and hold the pressure. A stovetop cooker does not. Set a real timer, not a mental one, because the difference between eight minutes and twelve is the difference between tender and mush.
Step seven: Choose your release on purpose. Natural release, meaning you take the pot off the heat and let pressure fall on its own, is what you want for anything shreddable. Pulled pork, beef chuck, beans, and stock all get better with a long natural release. Quick release, where you run cold water over the pot or open the valve, is for vegetables, seafood, and anything you are afraid of overcooking. Do not quick release a full pot of starchy liquid unless you enjoy cleaning the ceiling.
Step eight: Let the pot rest off the heat. There is no keep-warm button on a stovetop cooker, so the off-burner rest is your keep-warm. Take it off the flame, leave the lid on, and dinner holds for twenty minutes while you deal with whoever needs a ride somewhere. This is the step that makes a weeknight dinner actually land on the table warm.
Step nine: Count your pans. If you seared in the cooker and cooked in the cooker, you are washing one pot and one lid. That is the whole point. If your sear did not happen in the pot, you are washing two, and the second one is the reason you were late to the table.
Mistakes I still make
Filling past the line because it looks like it will fit. It always looks like it will fit. Then it foams into the vent and I am wiping down the backsplash. Fill to two-thirds and accept that you are cooking for tonight, not for the freezer.
Walking away during the pressurizing phase. The first three minutes are when a stovetop cooker needs you. Once the regulator is rocking steadily, you can leave it, but not before.
Using an old gasket because a new one feels like a hassle to order. A worn ring leaks steam, the cooker takes longer to come to pressure, and the food cooks unevenly. Order the spare before you need it and this problem disappears.
Quick releasing everything because I am impatient. I do this more than I should. A quick release on a pork shoulder gives you meat that shreds into strings instead of collapsing into that soft, pull-apart texture. Patience is the actual ingredient.
What this actually costs you
I am not going to quote prices here, because they move and the listing is the only number that matters. What I will tell you is the shape of the spend. The cooker is a one-time purchase that, treated reasonably, outlives most of the appliances on your counter. The gasket is the consumable, and it is the cheapest thing you will buy for the kitchen this year.
That is the trade. A stovetop cooker costs you attention on the front end and saves you money on the back end, because there is nothing inside it to break. An electric cooker costs you more up front and asks for less attention, but it has a control board, a heating element, and a lid sensor that can all fail. Both are honest choices. I own both, and I use both, and I will not pretend one is right for everyone.
The one rule I would hold across any of them: if you cannot buy the sealing ring separately, do not buy the cooker. That single check has saved me more money than any sale price ever has.
Questions I get every week
Do I have to use the trivet? No, but it helps. A trivet keeps food out of the liquid, which matters for anything you are steaming rather than stewing. For chili and soup, skip it.
Can I double a recipe in a four-quart cooker? Not really. Pressure cookers need headroom, and doubling a recipe fills the pot past the safe line. Cook two batches or use a bigger pot.
How do I get rid of the smell in an old gasket? You mostly do not. You replace it. Baking soda and vinegar help for a week, then the smell comes back. Two rings used for different jobs is the practical answer.
Is a stovetop cooker safe for a beginner? Yes, with one condition. Read the manual once, all the way through, and do not skip the part about the vent and the overpressure plug. The cooker is not dangerous. Guessing is.
The bottom line
Stovetop pressure cooking comes down to four habits: a gasket that seals, a pot that is not overfilled, a flame that is turned down once pressure is up, and a timer you actually set. Everything else is seasoning. Get those four right and a four-quart stainless cooker will put dinner on the table faster than anything else in your kitchen, including the machine with the touchscreen.
Start with the pot. Learn the sound it makes when it is happy. Then buy the spare ring before you need it, and you will still be cooking with the same cooker five years from now.